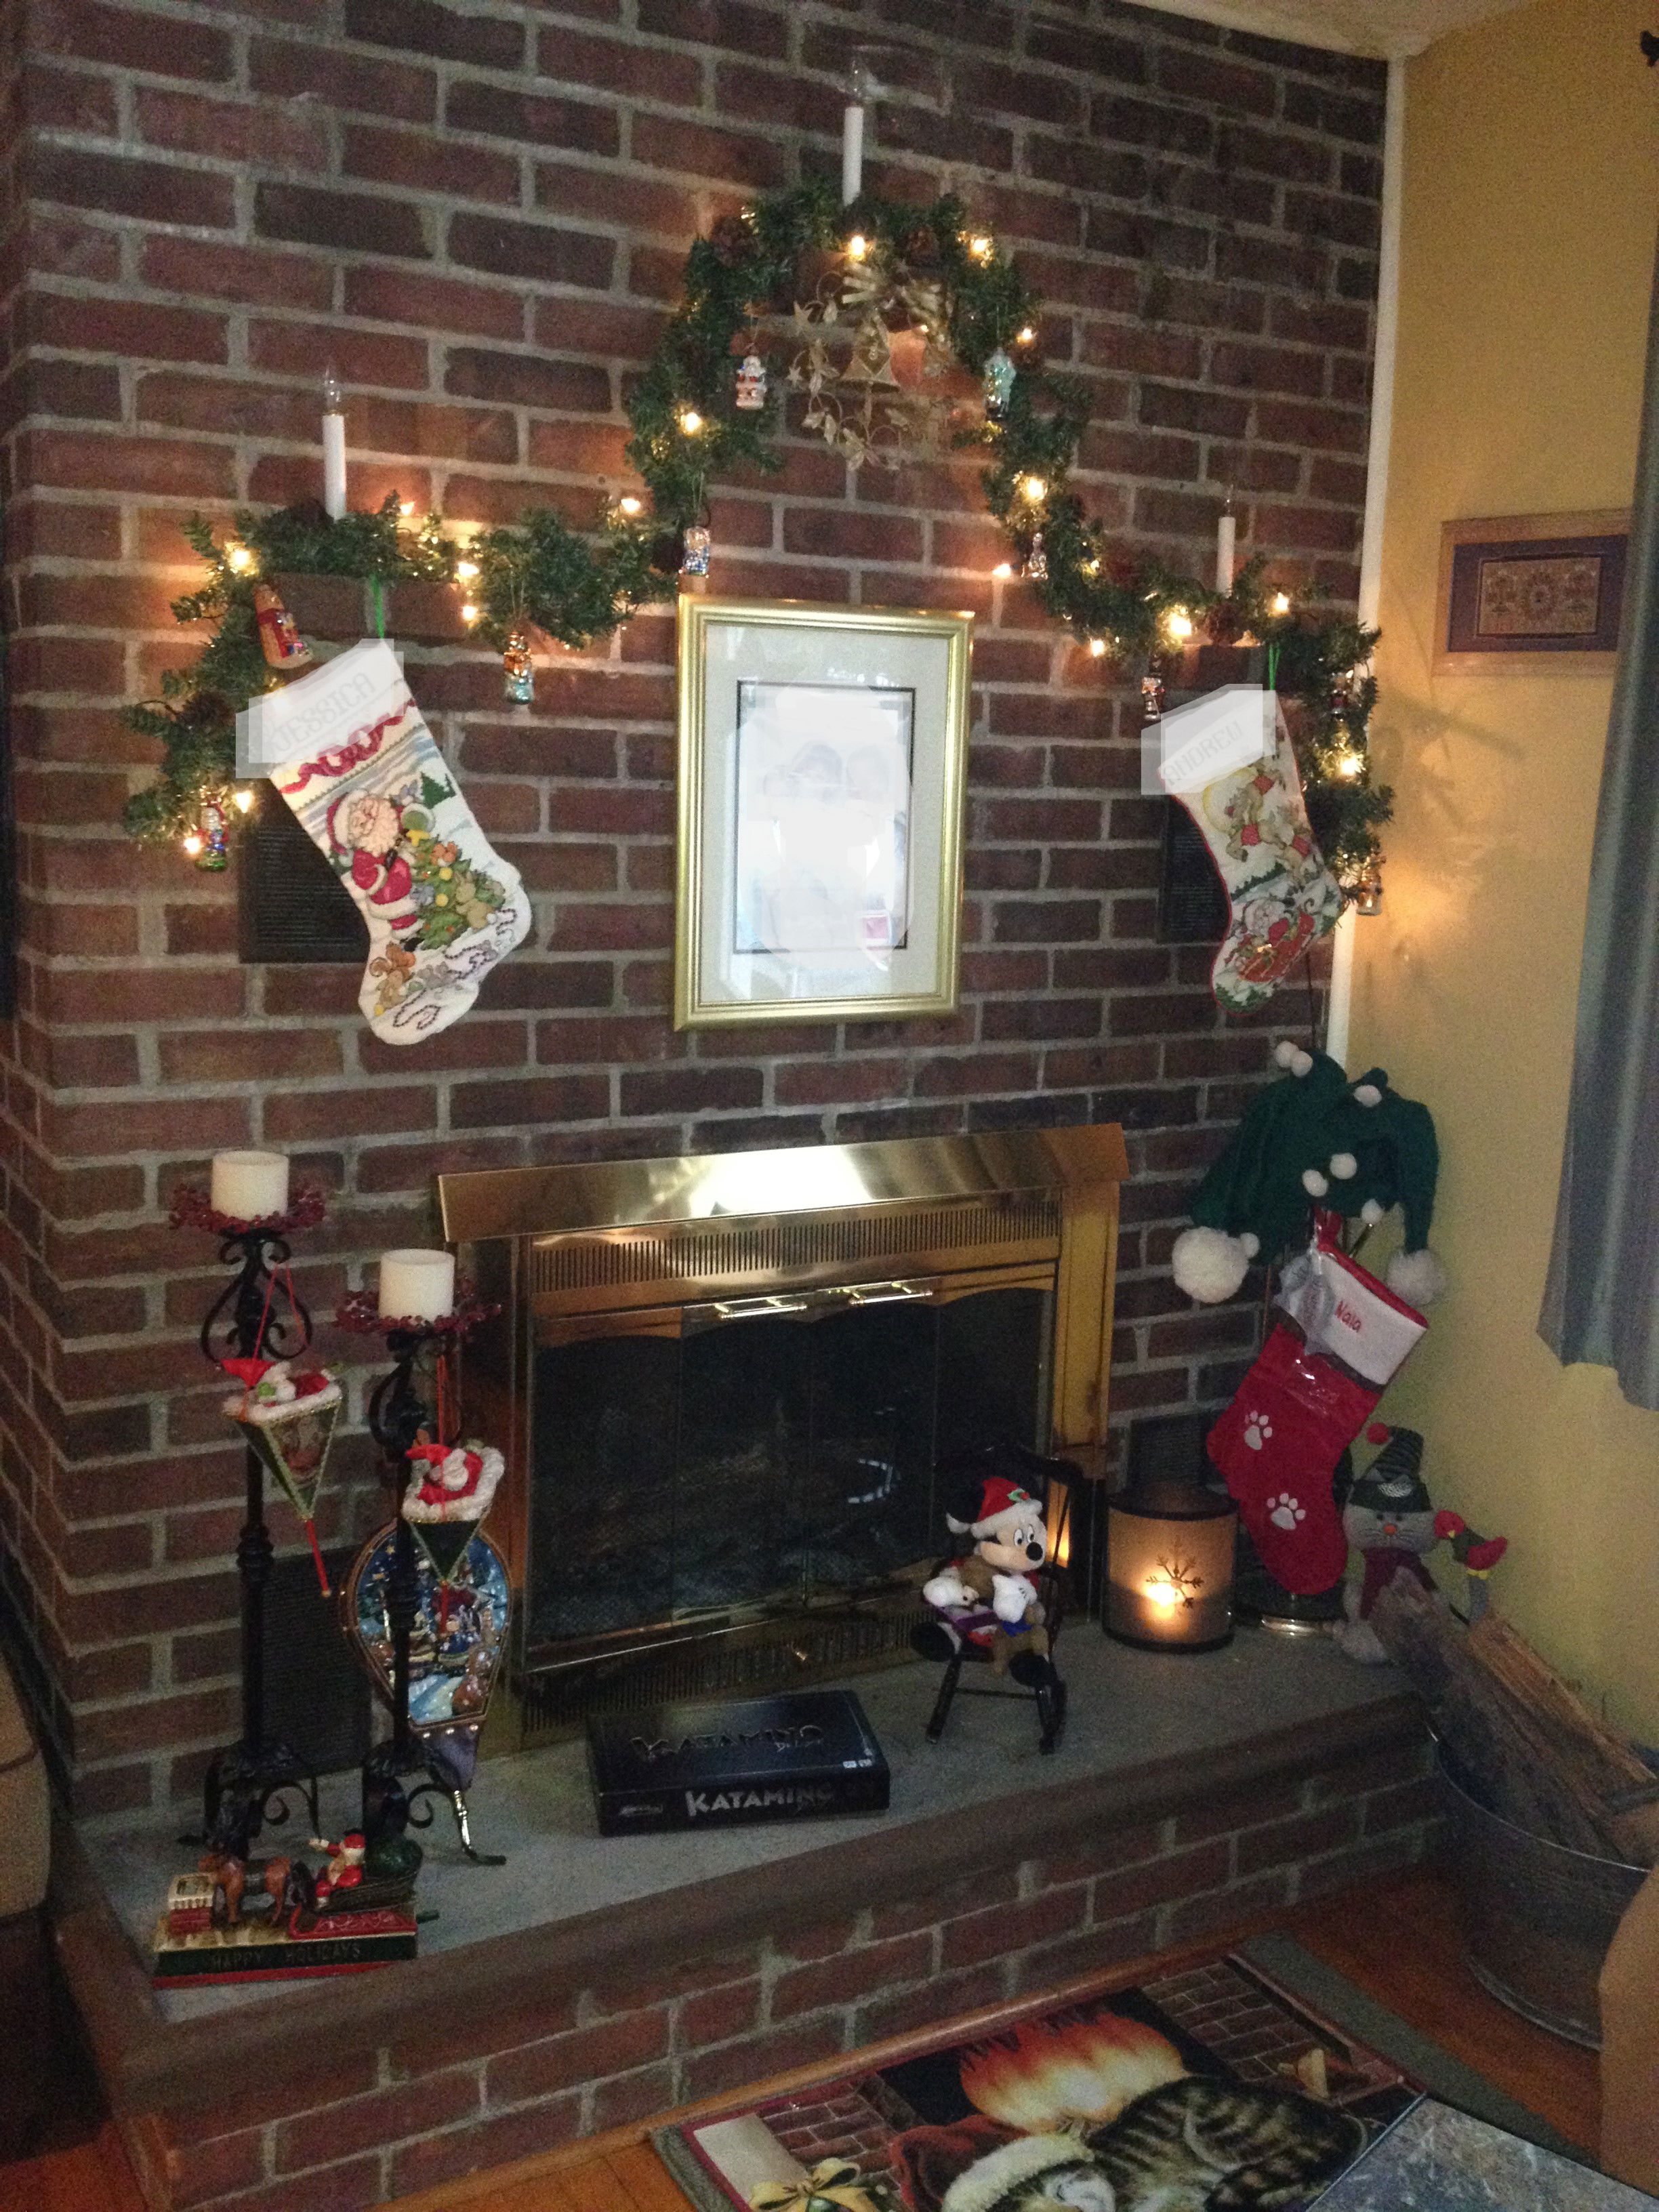
Several years ago, I took the plunge and painted our traditional, red-brick fireplace, as well as the brass framed doors and tools. I’d disliked the look for a while, but the project seemed daunting and irreversible. So, I hit Pinterest and several other blogs for information and inspiration. I saw a lot of brick whitewashing, lime treatments and neutral paints (white, beige, black, grey), all of which were great. However, I had a slightly different vision.
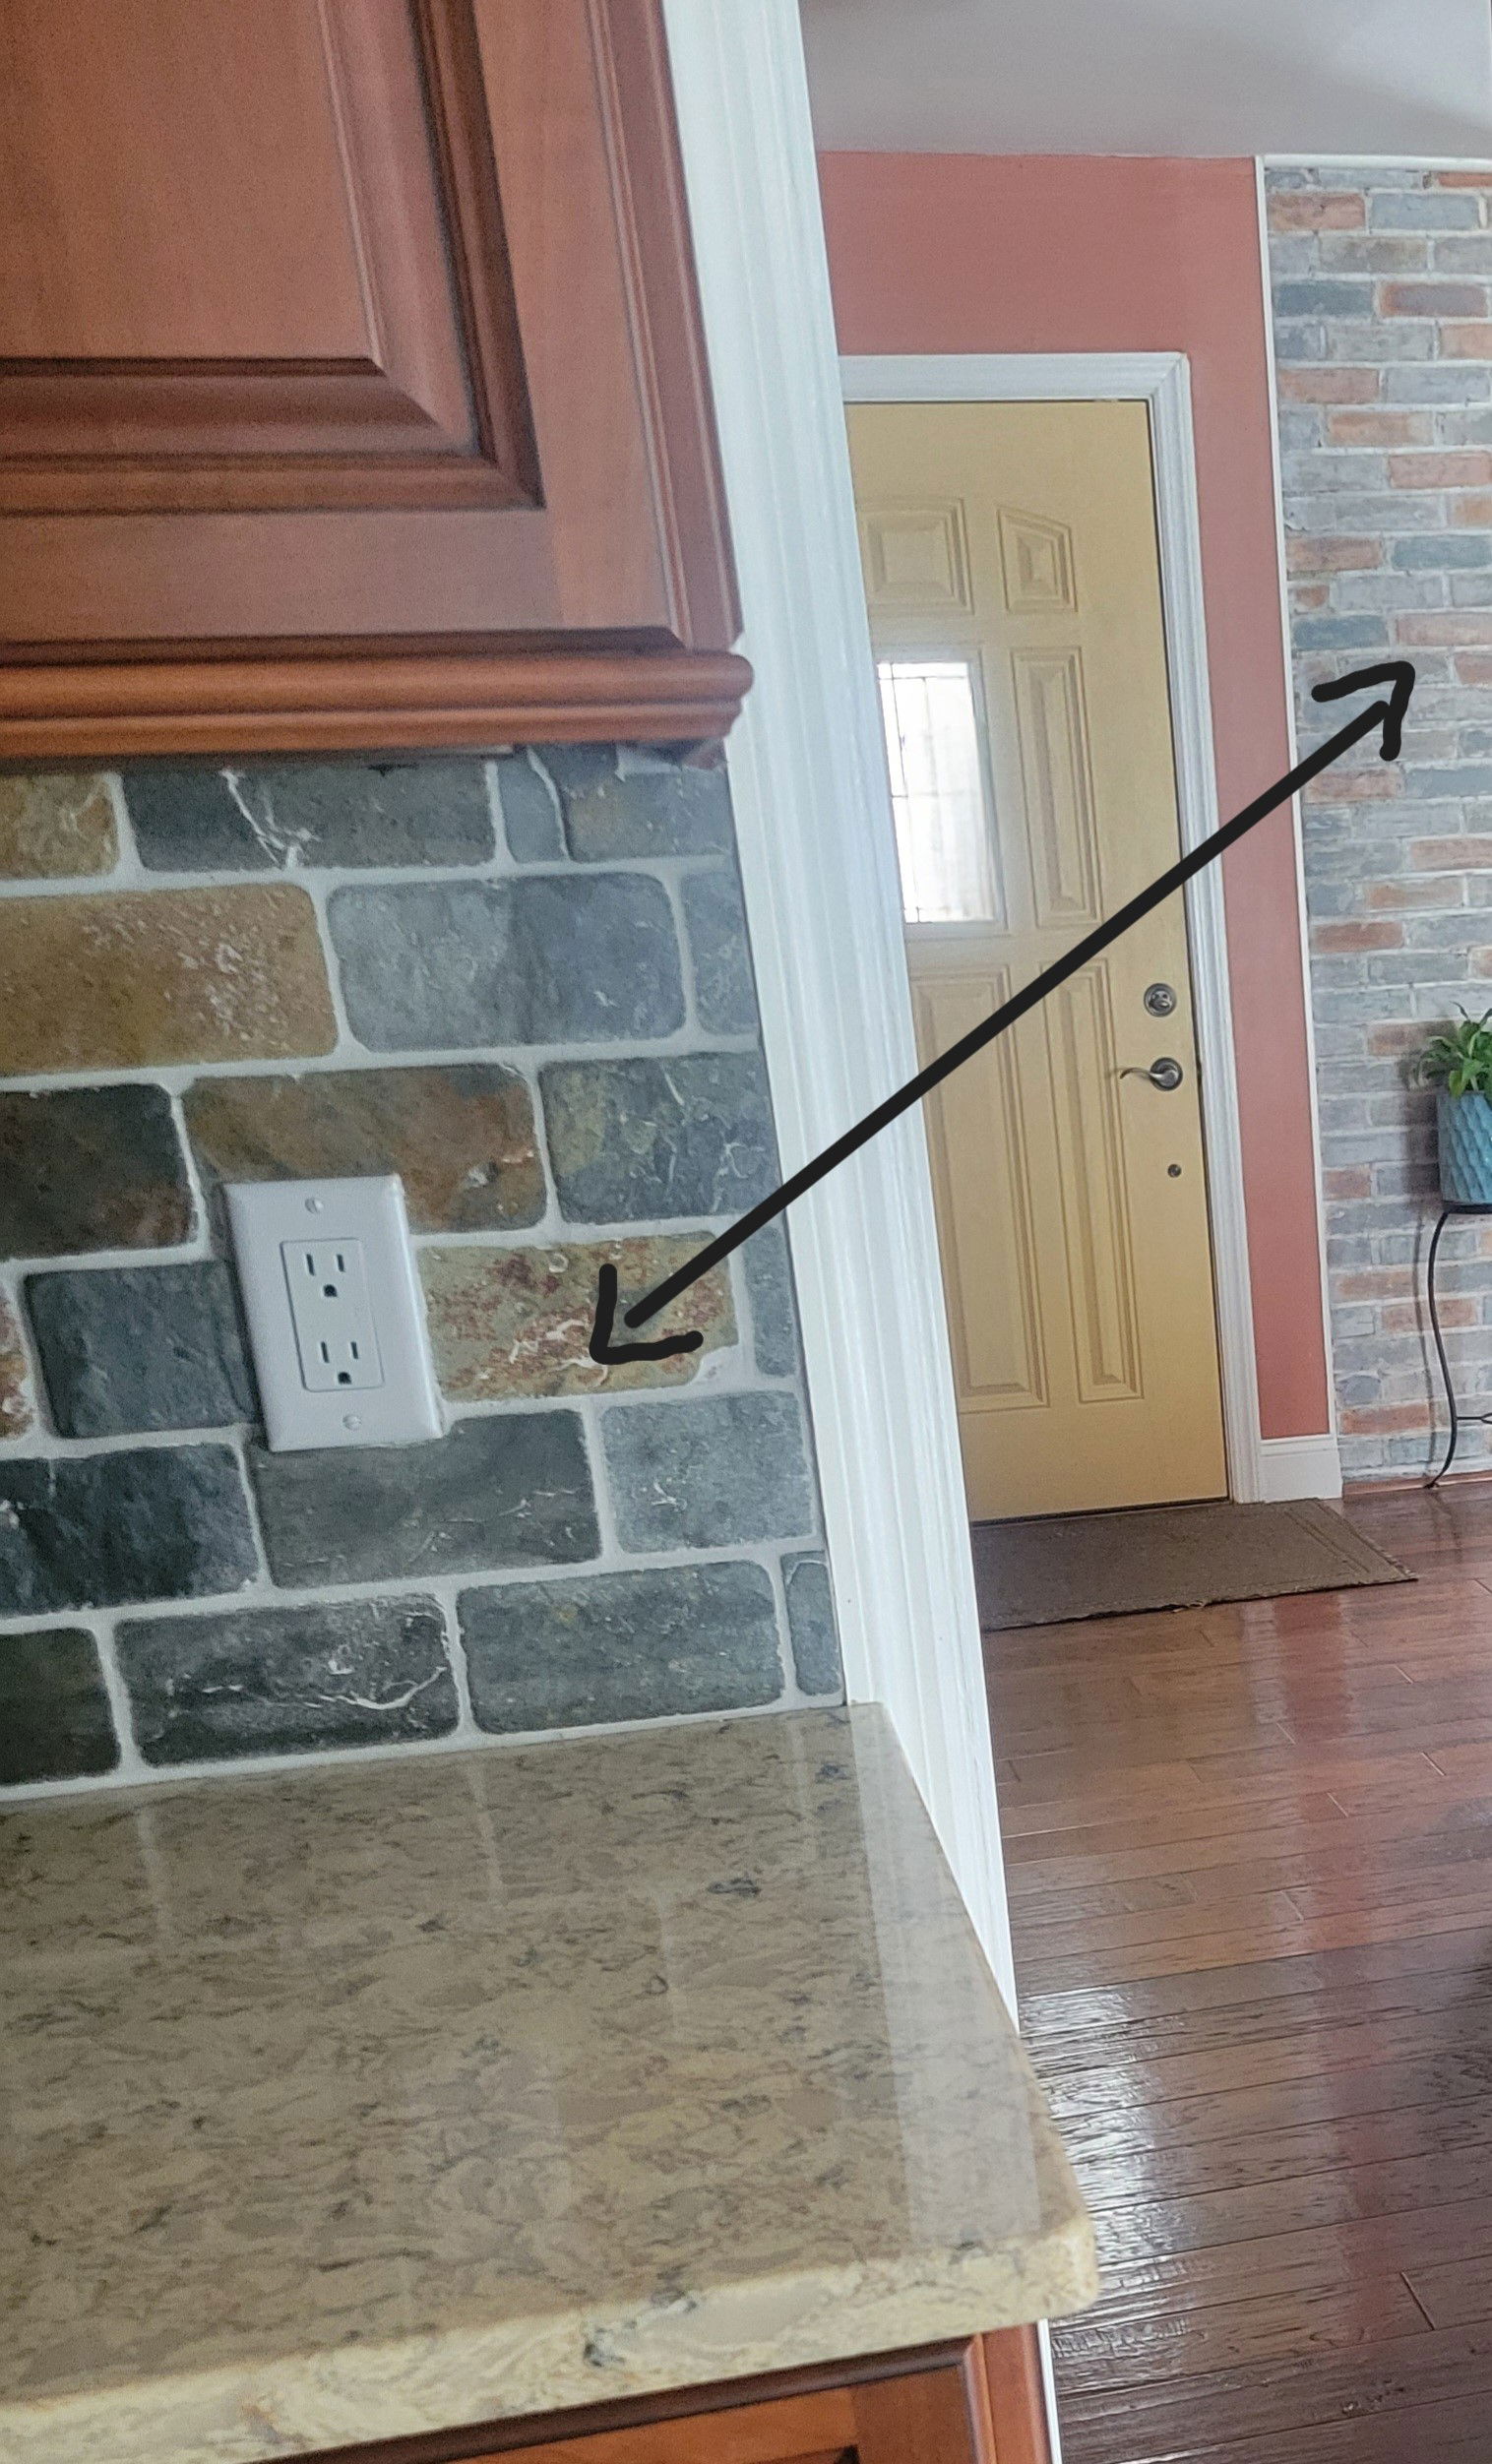
We had recently renovated our kitchen and I had taken a lot of time to pick the perfect backsplash. Our home décor has a Southwest feel with darker woods and terracotta accent walls, and pops of muted yellows, blues, and teals. I found a rustic and personally appealing tumbled stone tile that picked up all the shades I loved. I wanted to mimic that look on the fireplace…and I didn’t want to spend a mint.
In addition to updating the actual brick, the outdated brass framed doors and fireplace tools needed a facelift. Nothing a little black paint couldn’t remedy!
ORIGINAL FIREPLACE:

KITCHEN BACKSPASH INSPIRATION:
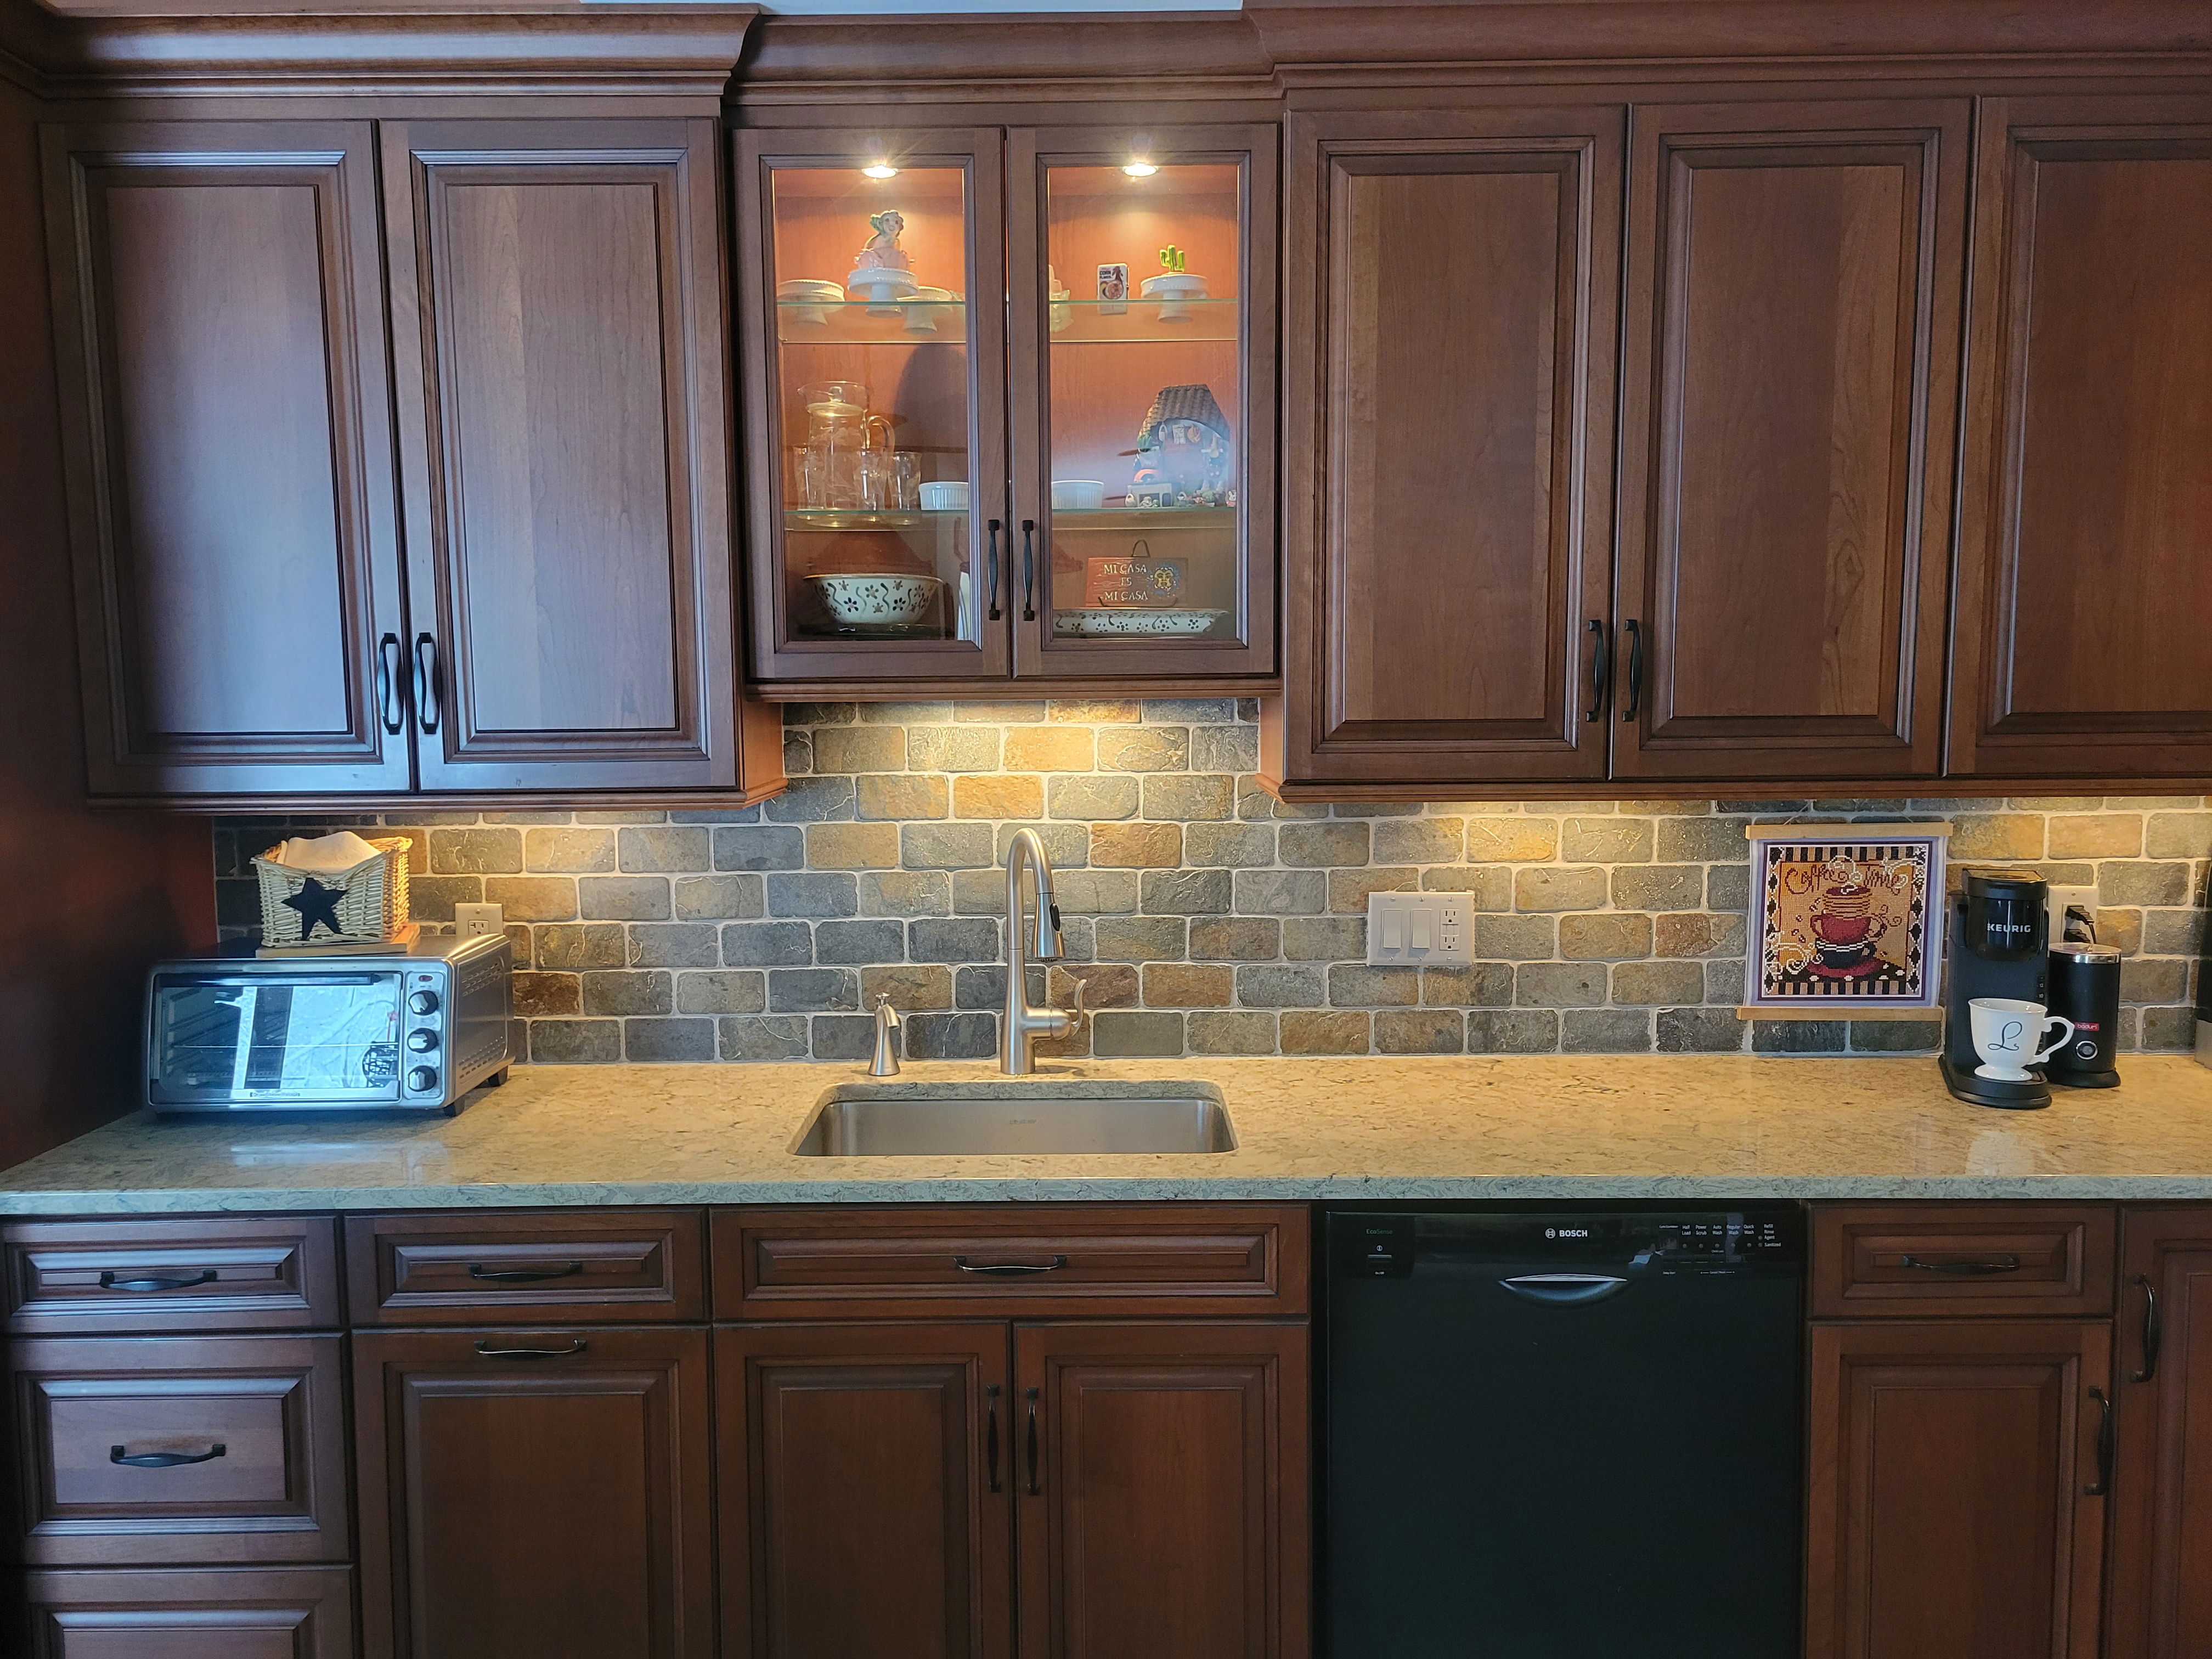
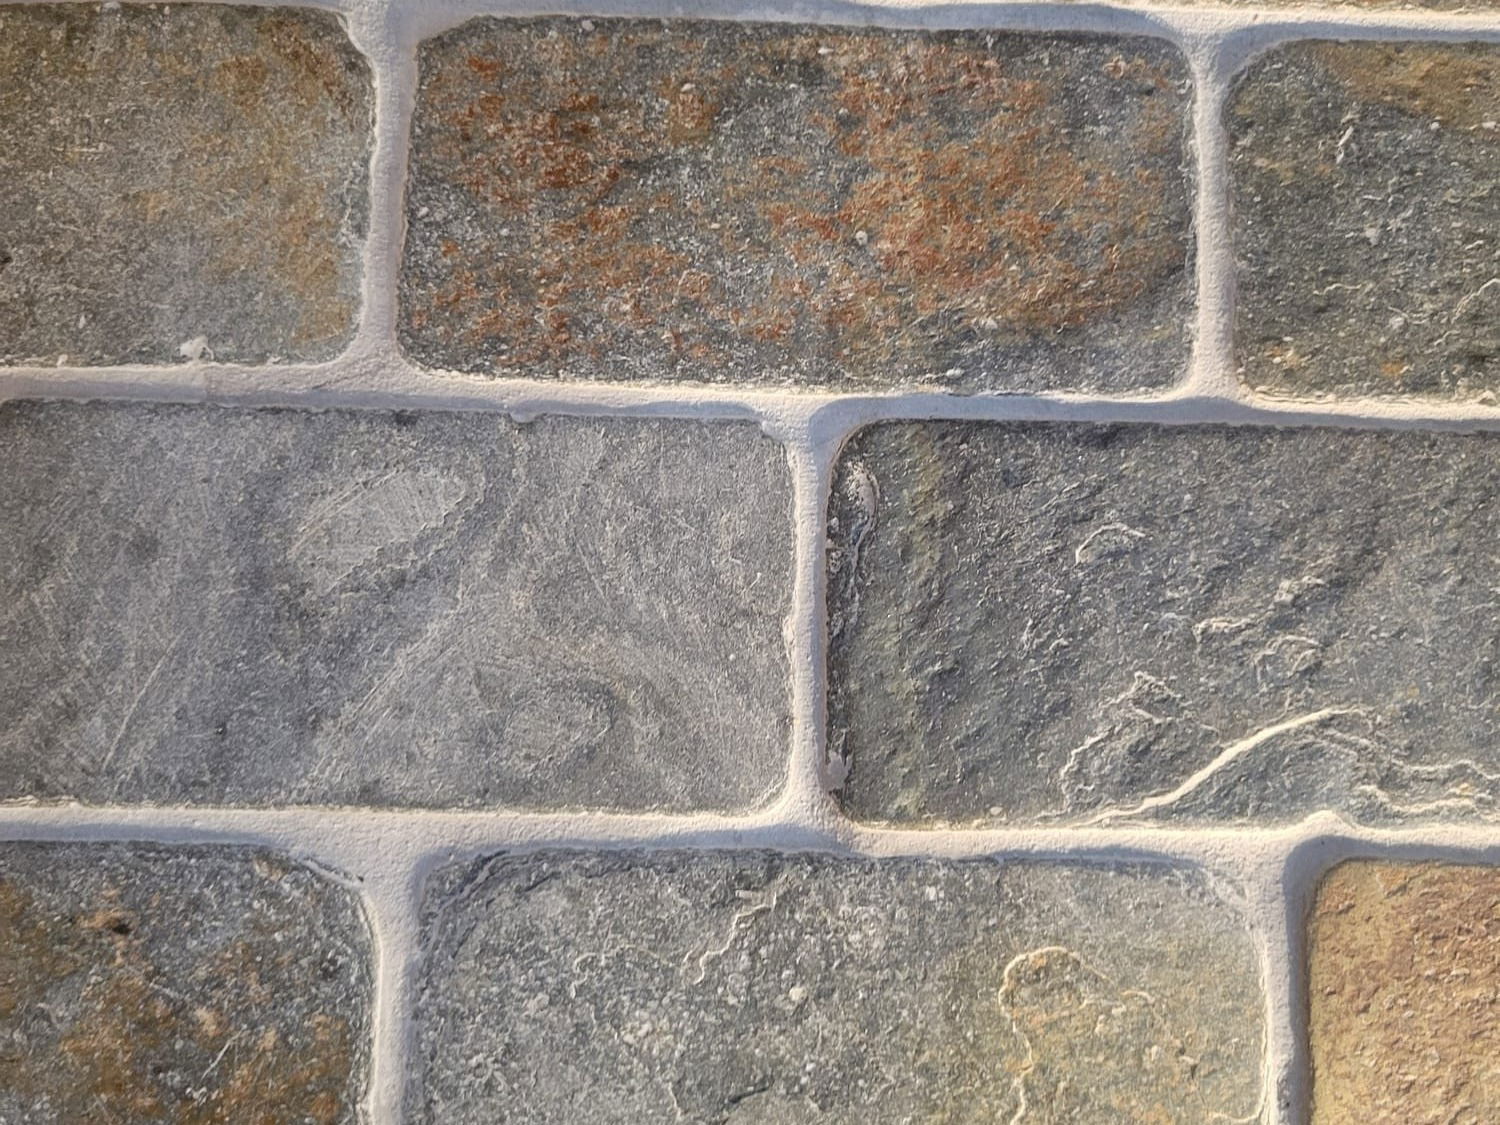
Radical Idea: Recreate the multi-hued effect of the backsplash on the fireplace brick using leftover paints from the rest of the house; paint the door frame and tools black to ground the space and take it out of the 90’s.
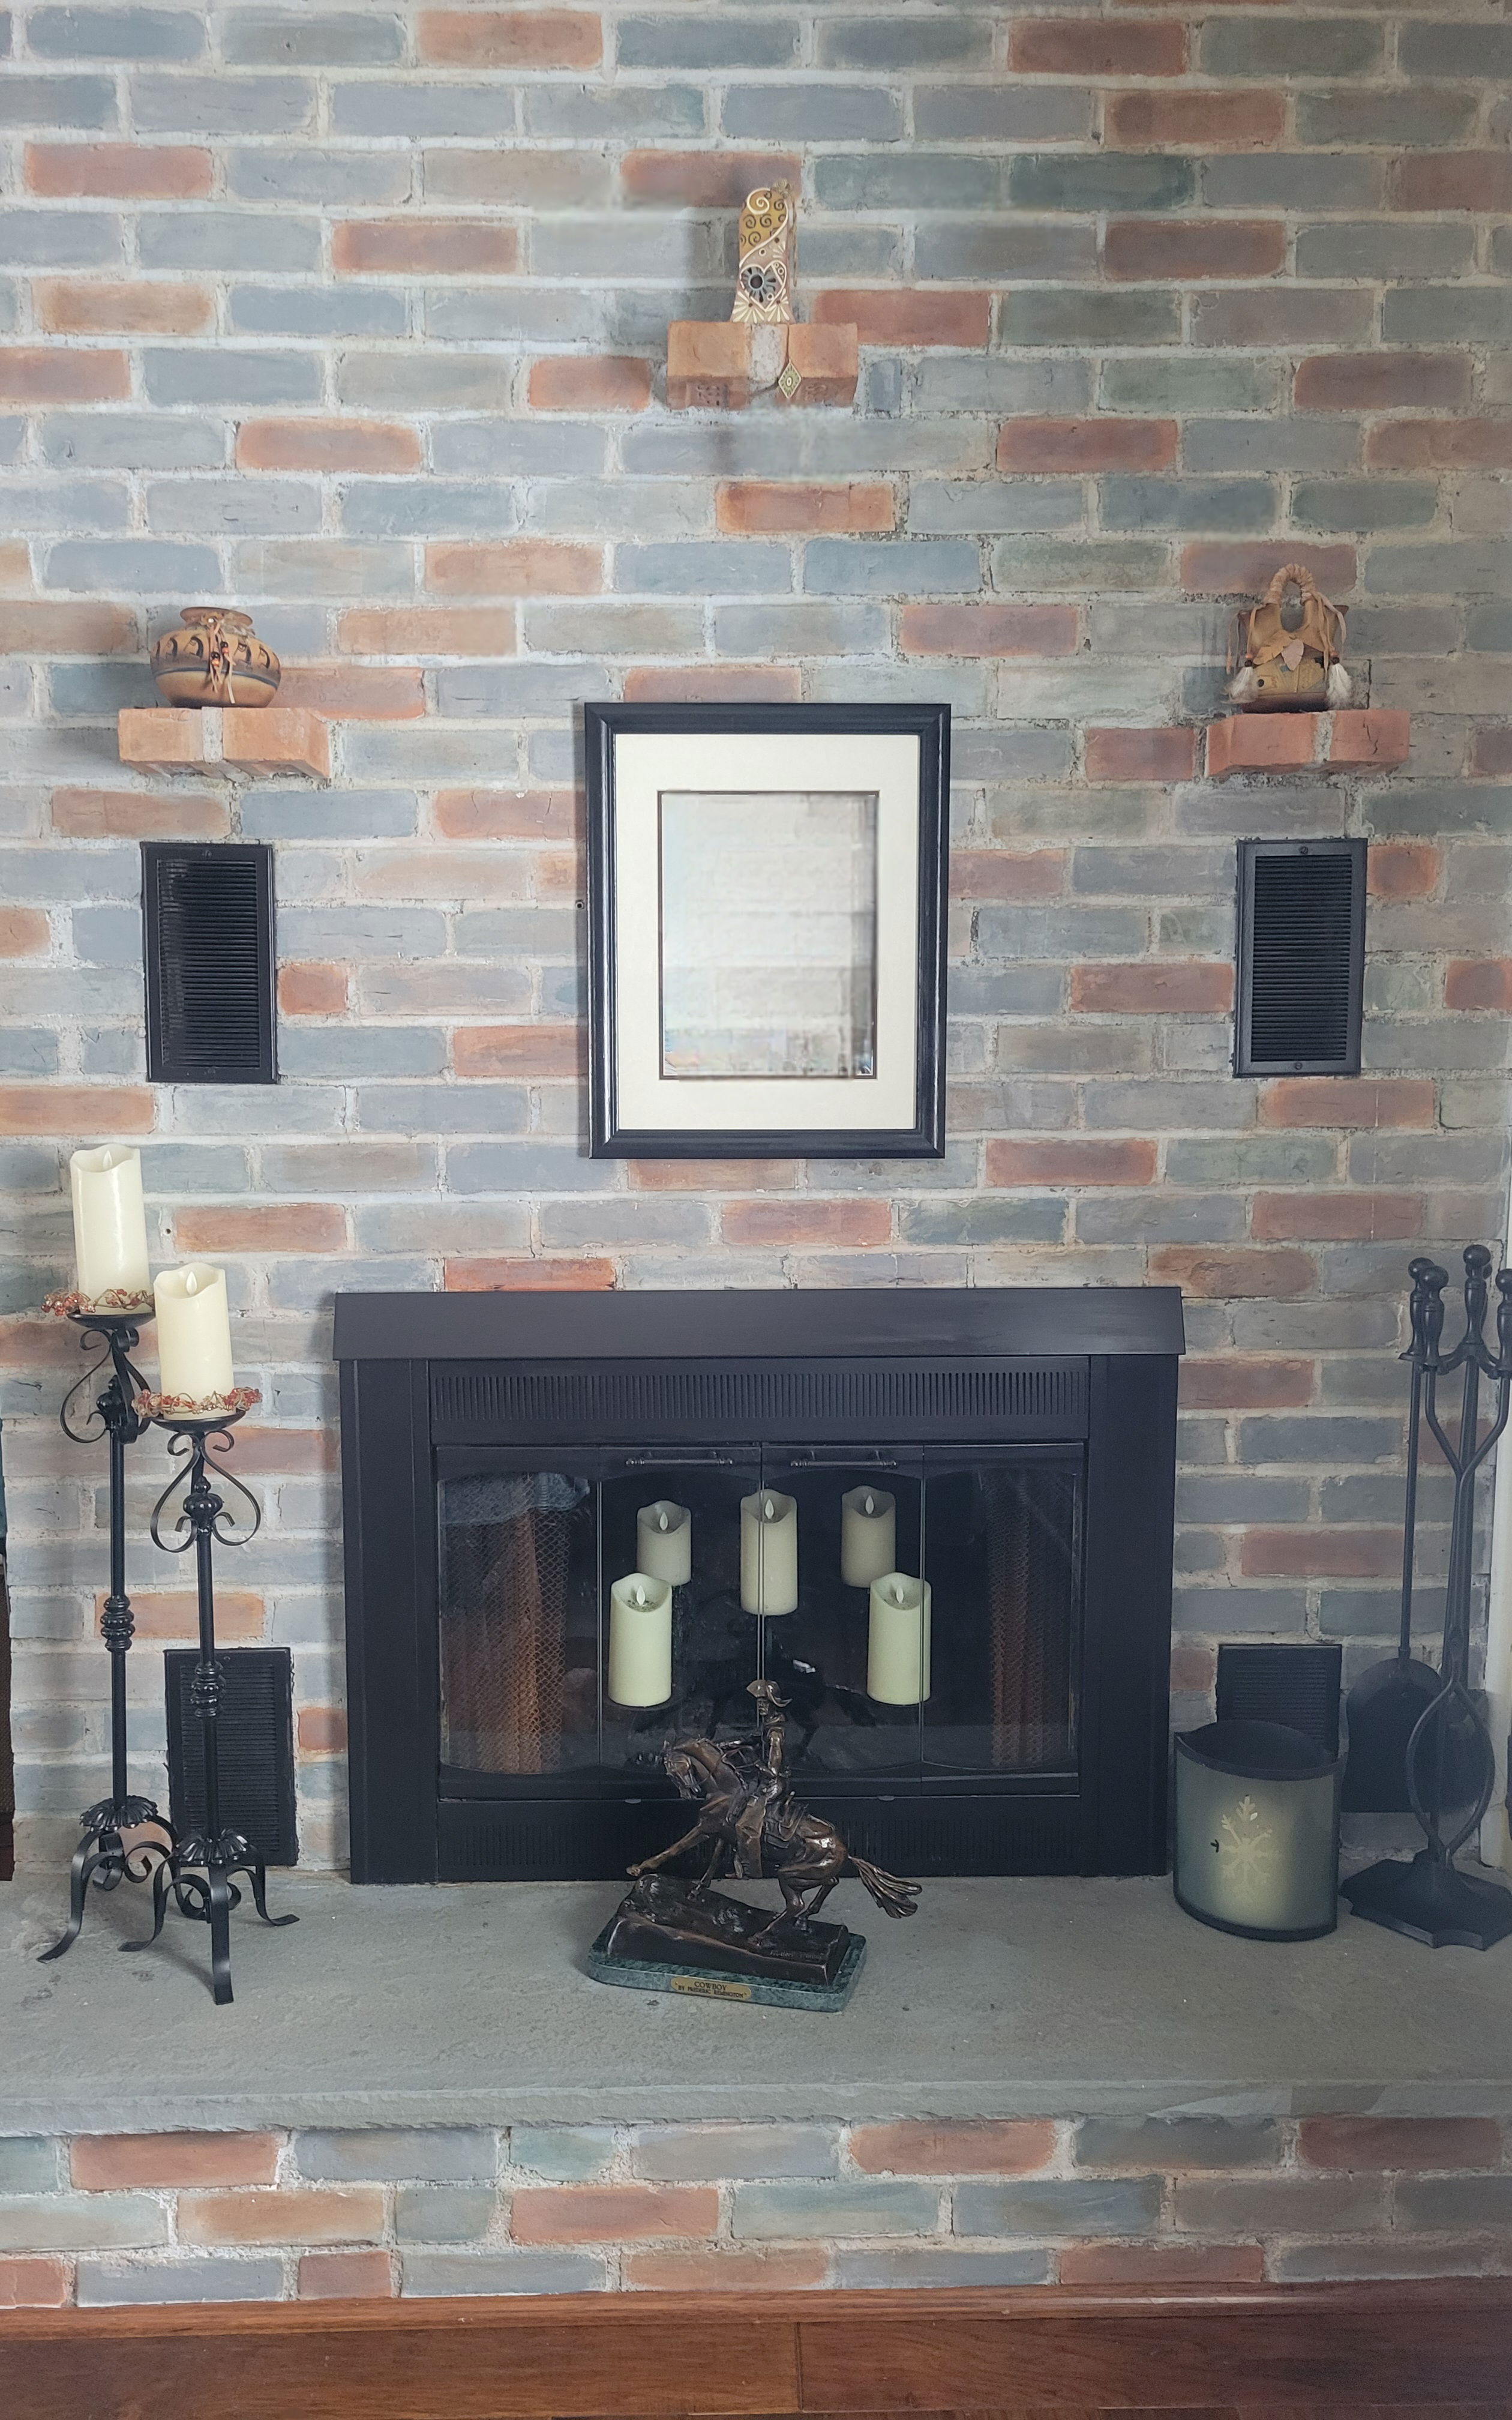
Result: A livelier, cleaner, and more updated look that reflected our style and created a cohesiveness with the stonework in the kitchen.
UPDATED FIREPLACE:
BACKSPLASH TO BRICK COMPARISON:
Breaking it down:
PREPARATION IS KEY! Read all the below once through. Take your time executing each step to ensure few mess-ups and easier cleanup.
Materials:
- Personal Protective Equipment: Safety glasses, gloves, mask
- Wire Brush
- Sponge for cleaning
- Vacuum
- Citrus Cleaner, such as INSL-X All-Purpose Citrus Cleaner
- Trisodium phosphate (degreaser), such as Savogran TSP
- Drop cloth, newspaper, painters tape
- Small short bristled and foam paintbrushes, natural sponges, paper towels
- Small, thick-nap paint roller (optional) Interior paints (either tap into colors you have on hand or go with primer based low sheen or flat paints – pint sizes would be best option)
- Black HEAT RESISTANT paint, 1 pint and 1 spray can, such as Rust-Oleum High Heat brush on enamel and spray on enamel
- Spray paint grip (optional), such as Rust-Oleum 241526 Comfort Grip
Brick Painting Process:
- Brush the brick
- Use a stiff wire brush to remove dust and dirt from the mortar lines, hearth, and brick surfaces.
- Check the mortar to ensure no repairs are needed before you paint.
- Vacuum up all the dust from the brick surfaces, hearth, and floor.
- Clean the brick
- Use a biodegradable, phosphate-free cleaner, such as INSL-X All-Purpose Citrus Cleaner. Follow directions on bottle carefully, do a spot test first, and rinse well. This step should remove most of the soot and deposits that could bleed through the paint.
- If a deeper clean is necessary, use Trisodium Phosphate, such as Savogran TSP . Again, read instructions carefully using the correct protective eye, breathing and hand equipment.
- Tape off any areas you want to protect
- Tape and/or paper trim, fireplace doors (if not removed), edges of firebox, hearth, etc. I recalled what a pain it was to install the doors and opted to keep them in place and work around the unit.
- Use newspaper and drop cloths to protect the hearth and floor.
- OPTIONAL: Prime the brick - Some tutorials encourage priming the mortar and brick surfaces with a moisture lock or good acrylic latex primer. I skipped this step. I used interior paints with primer built in. It’s been 6 years and I’ve had no issues.
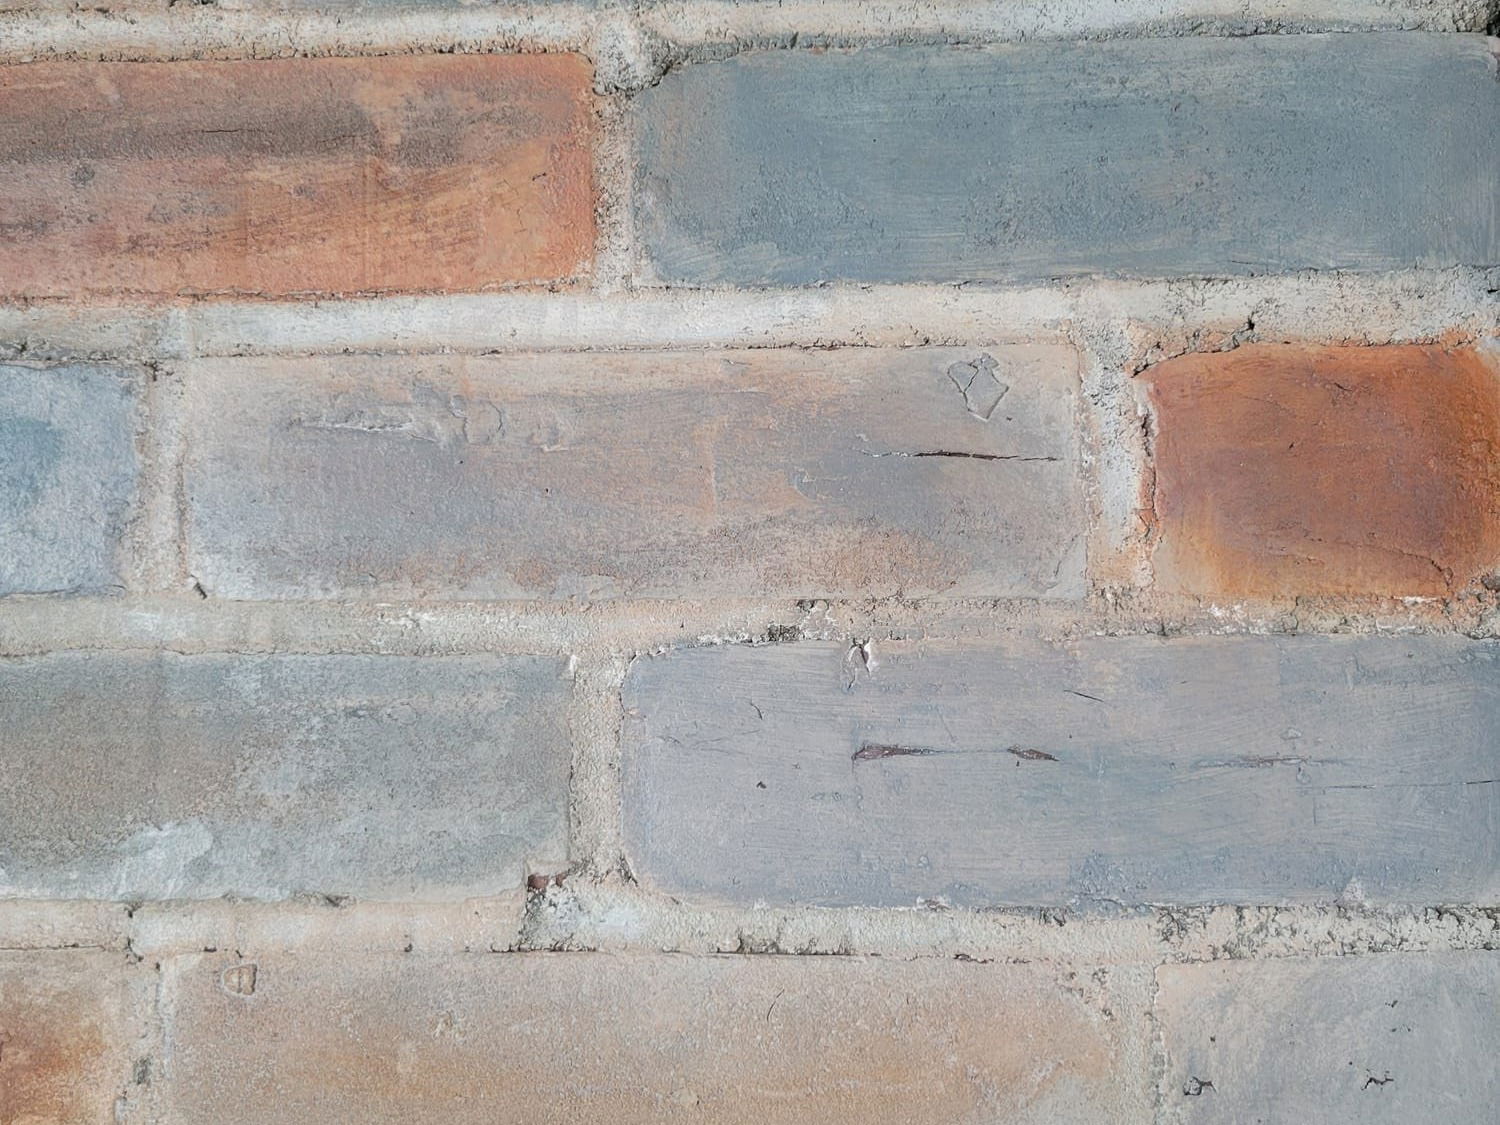
- Paint the brick - Below are the steps I took to achieve MY look, applying a mix of whitewashing and sponging techniques. For this project, I didn’t want a heavy coat of paint with a sheen on the brick. I was going for a more matted and natural look. I studied the colors and color patterns of the tile I was mimicking from the kitchen backsplash. From there I set out my white, terracotta, light blue, and grey paints and began.
- Start with the mortar lines using a light, neutral color. I used a grey mixed with white to lighten color and painted with a small, short bristled paint brush. I also gave the hearth a light rub of the same color to dissipate some old stubborn stains.
- Sponge each brick with lighter shades of each “base” color, blotting off any excess well. I used the terracotta, and grey “base” colors mixed with some white or light blue. Since I skipped step 4 (Prime the brick), I feel the paint absorbed into the brick and limestone, giving the desired muted appearance I wanted. Since my fireplace brick was exposed on one side, I was careful to wrap the same treatment around the ends of those brick edges.
- Go back and play with intensity, deepening the colors randomly.
- For the fourth pass, swipe the opposite colors across each brick, careful to avoid the mortar lines. For example, I swiped and blotted some grey on the clay-colored bricks and vice versa. I played with intensity on this step, as well. This gave the bricks some depth and less deliberate color blocking.
- For a final pass, after the paint is completely dry, give the fireplace another once over. I waited until the next day, with fresh morning light on the scene, and perfected the colors and overall look.
Fireplace Door Frame and Tools Painting Process:
This part of the project, I did outdoors.
- Clean the fireplace doors
- Wash and dry the doors thoroughly
- Make sure to address the edges of the metal and glass.
- Tape off any areas you want to protect
- Tape and paper the glass on the doors, as well as the surrounding brick and hearth, if the unit is not removed. Again, I recalled what a pain it was to install the doors and opted to keep them in place.
- Use newspaper and drop cloths to protect the hearth and floor.
- Paint the door frame
- Carefully apply thin coats of HEAT RESISTANT paint meant for repainting barbeque grills and such. I felt this option was safest.
- Use longer strokes to get the smoothest finish. The paint is thick and will “fill in” as you go, giving a wrought iron look.
- Clean the fireplace tools and stand
- Wash the tools thoroughly, scrubbing off any extra ash and soot buildup.
- Dry all the pieces.
- Paint the tools and stand
- On a drop cloth, apply sweeps of HEAT RESISTANT spray paint to cover all sides of each piece. You may need to wait until one side is dry, then flip over. NOTE: since doing this project (among other spray paint work), I’ve discovered the spray paint grip/gun that saves you from painted and aching fingers… MAGICAL!! There are many out there, but I like the Rust-Oleum 241526 Comfort Grip.
- Recheck all sides for full coverage and let fully dry before replacing in stand.
What this makeover was NOT:
- It was NOT expensive. I used and mixed leftover paints.
- It was NOT based on a color-scheme for everyone. Resale staging may indicate a more monochromatic color-scheme.
- It was NOT a difficult project if you prepare ahead. Preparations, painting, and refining the colors took the better part of a full day. Perfecting the overall look was done some next-day enhancements.
What this makeover WAS:
- It WAS a custom and detailed project. Mortar and each brick were hand painted/sponged.
- It WAS an outcome that we loved, yet something that can easily be revised in the future.
- It WAS a project doable over a weekend.
- It WAS deeply satisfying and therapeutic work.
Your Feedback Matters!
Have questions about this REfresh? Have comments or suggestions? Want to start working on your own space with Laura? Please reply in the comment section below. Also, thinking beyond the REdecorate with Laura business moniker, take note I am also a certified professional organizer. Think: organizing your files, your kitchen cabinets, your closets, your garage, and so on. Sometimes, just putting things away and in order is all it takes to gain some inner peace and breathing room! For more information, please reach out via the Contact link.
*Disclaimer: Laura Cruz does not currently stand to profit from, or is receiving any favors or income associated with, her company or product recommendations and/or associated links in this article.